该文章主要介绍了存储卷在TKE上的使用。
PV,PVC,StoragClass配置使用
StoragClass配置使用
StorageClass 描述存储的类型,集群管理员可以为集群定义不同的存储类别。腾讯云 TKE 服务默认提供块存储类型的 StorageClass,通过 StorageClass 配合 PersistentVolumeClaim 可以动态创建需要的存储资源。
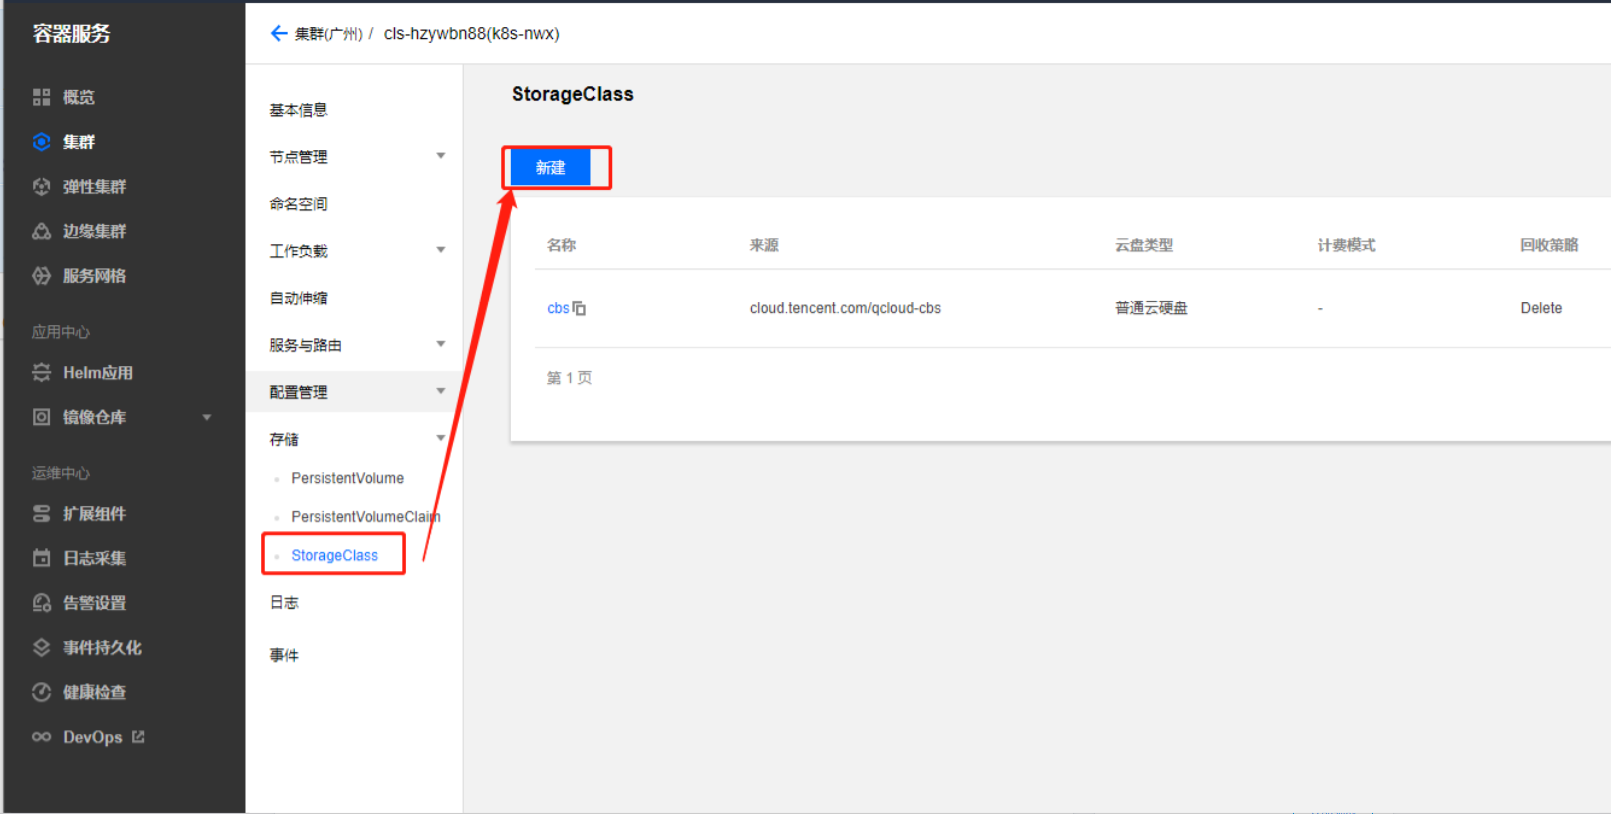
找到你的集群,选择存储中的storaeclass,点击新建
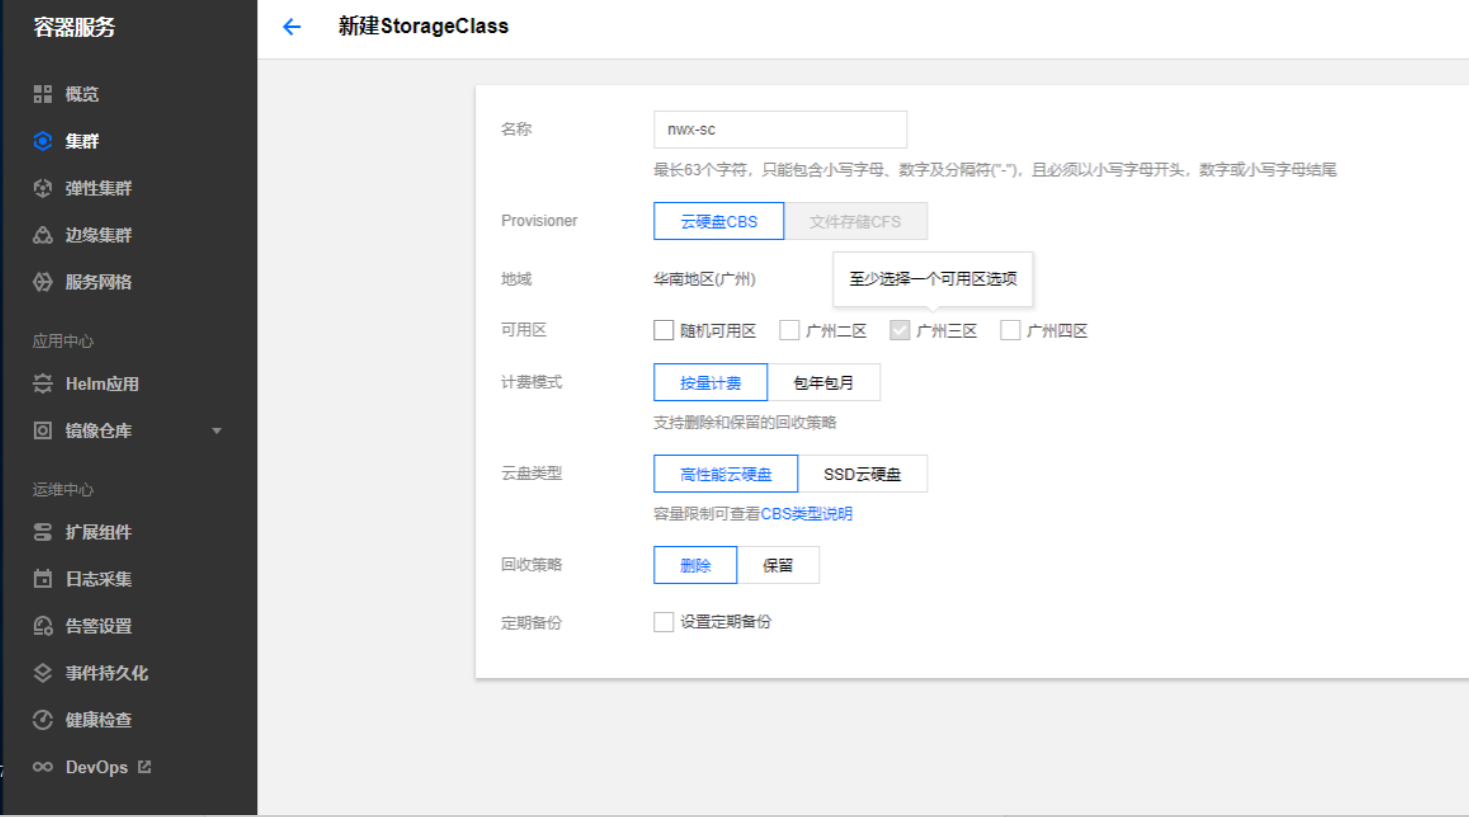
根据实际需求,设置 StorageClass 参数。关键参数信息如下:
- 名称:自定义。(我填写的是nwx-sc)
- 计费模式:根据实际需求进行选择。(我选择的是按量计费)
- 可用区:根据实际需求进行设置,默认为 “随机可用区”。(我这里选择广州三区)
- 云盘类型:根据实际需求进行选择。(我选择的是高性能云硬盘)
- 回收策略:根据实际需求进行选择。(我选择的是删除)
单击【创建StorageClass】,完成创建。
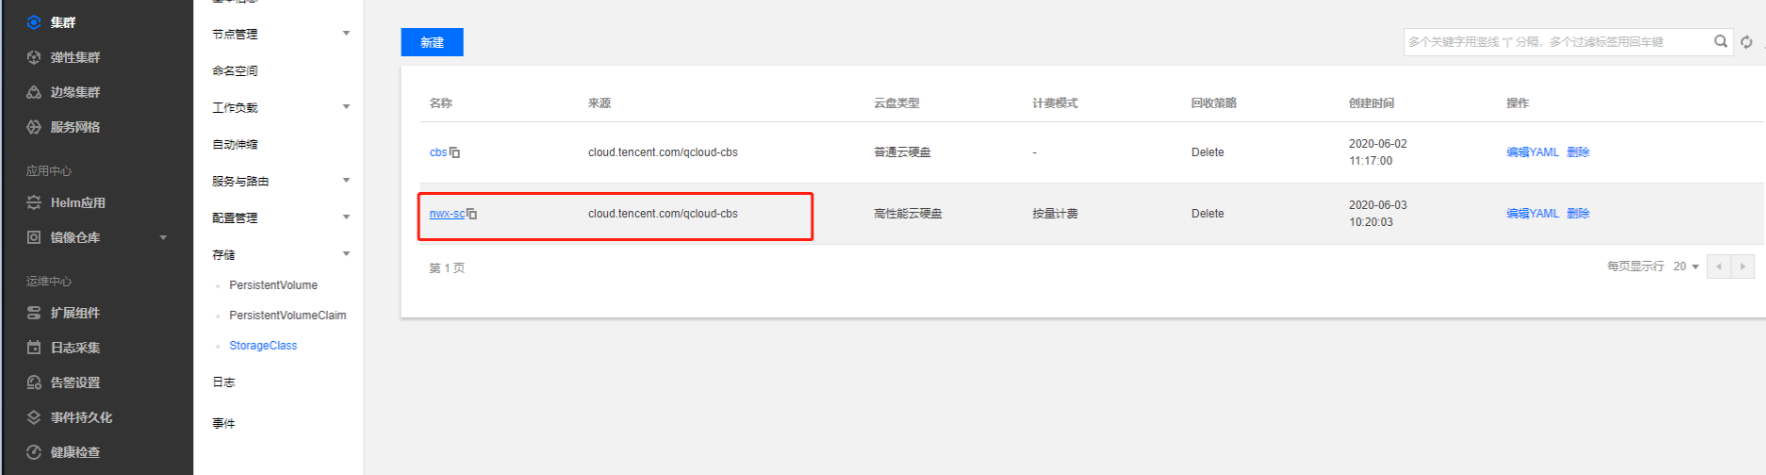
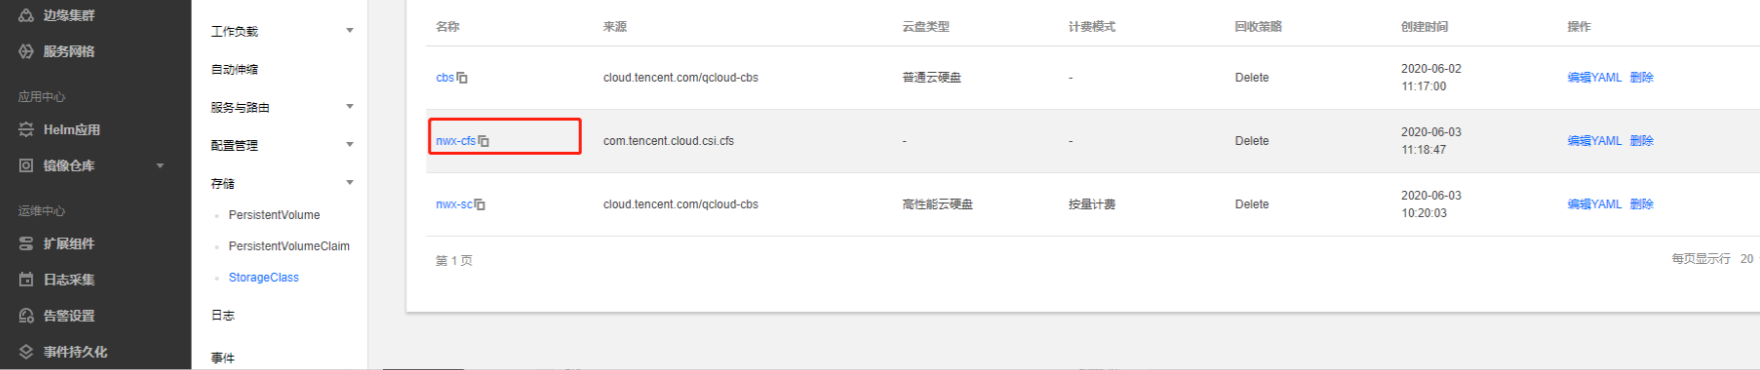
至此,storageclass创建完成!
PVC的配置使用
创建PVC
PersistentVolumeClaim(PVC):集群内的存储请求。例如,PV 是 Pod 使用节点资源,PVC 则声明使用 PV 资源。当 PV 资源不足时,PVC 也可以动态创建 PV。
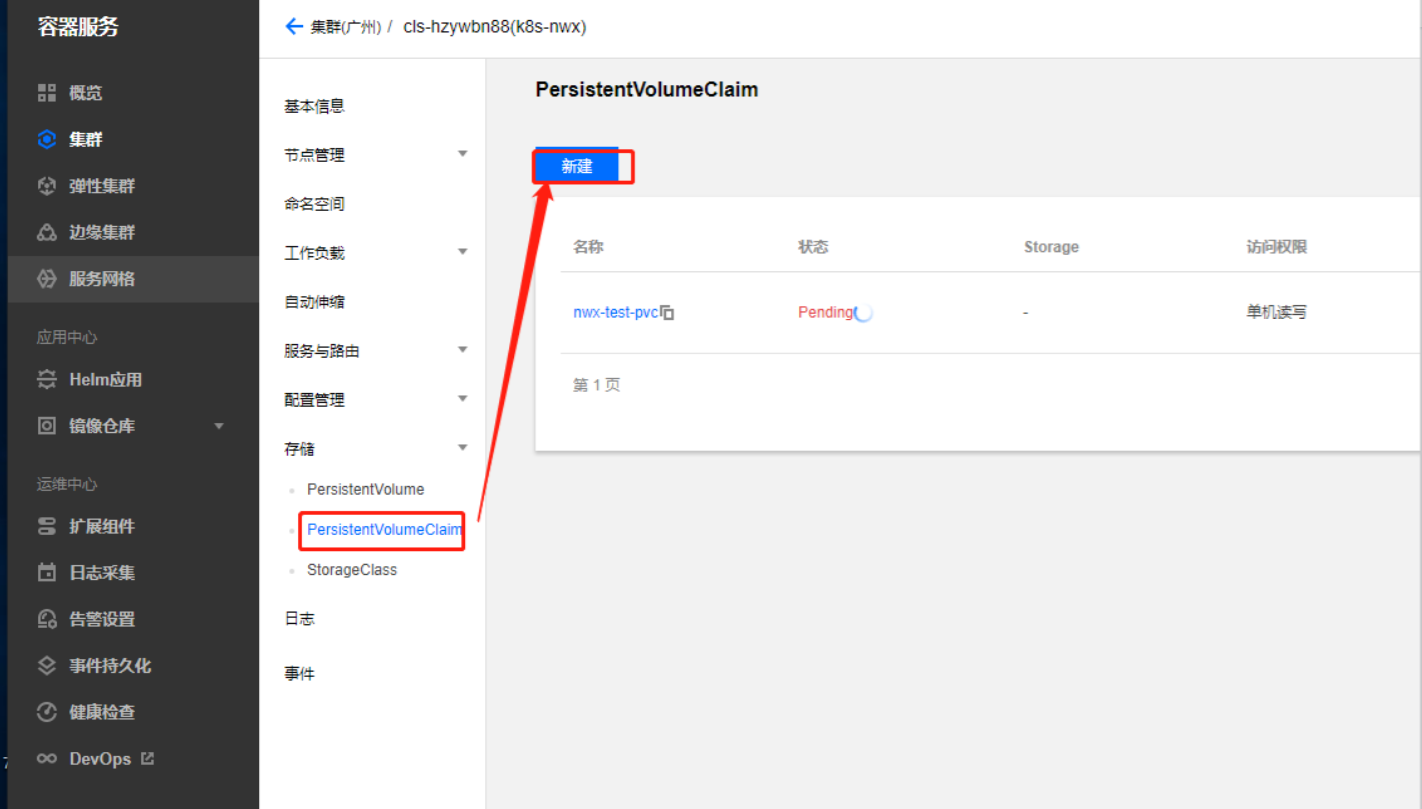
点击存储,选择PVC,再点击新建

填写pvc名称,我这里写的是nwx-test-pvc,选择命名空间为test,读写权限为单机读写,SC选择我们之前创建的nwx-sc,大小为10G。
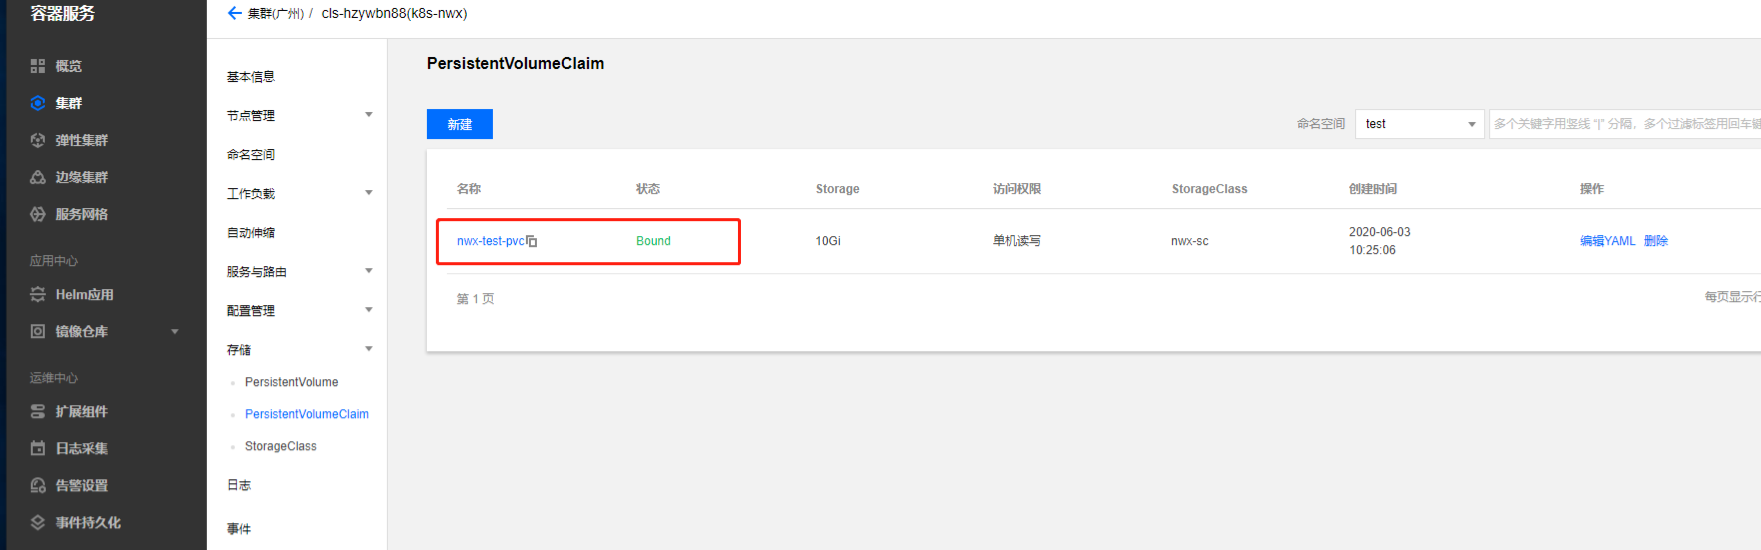
PVC已经创建完成
控制台配置挂载PVC
我们把新建的pvc挂载到之前的nginx服务中,我们可以通过修改yaml和在控制台修改配置进行挂载
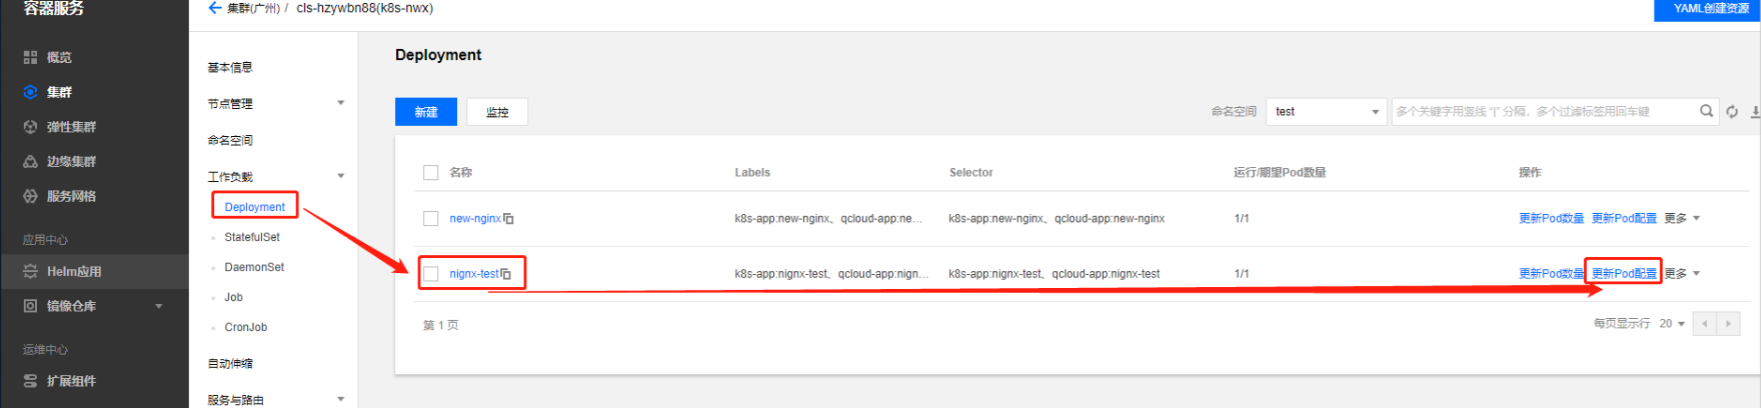
找到我们之前创建的deployment,然后点击pod配置修改
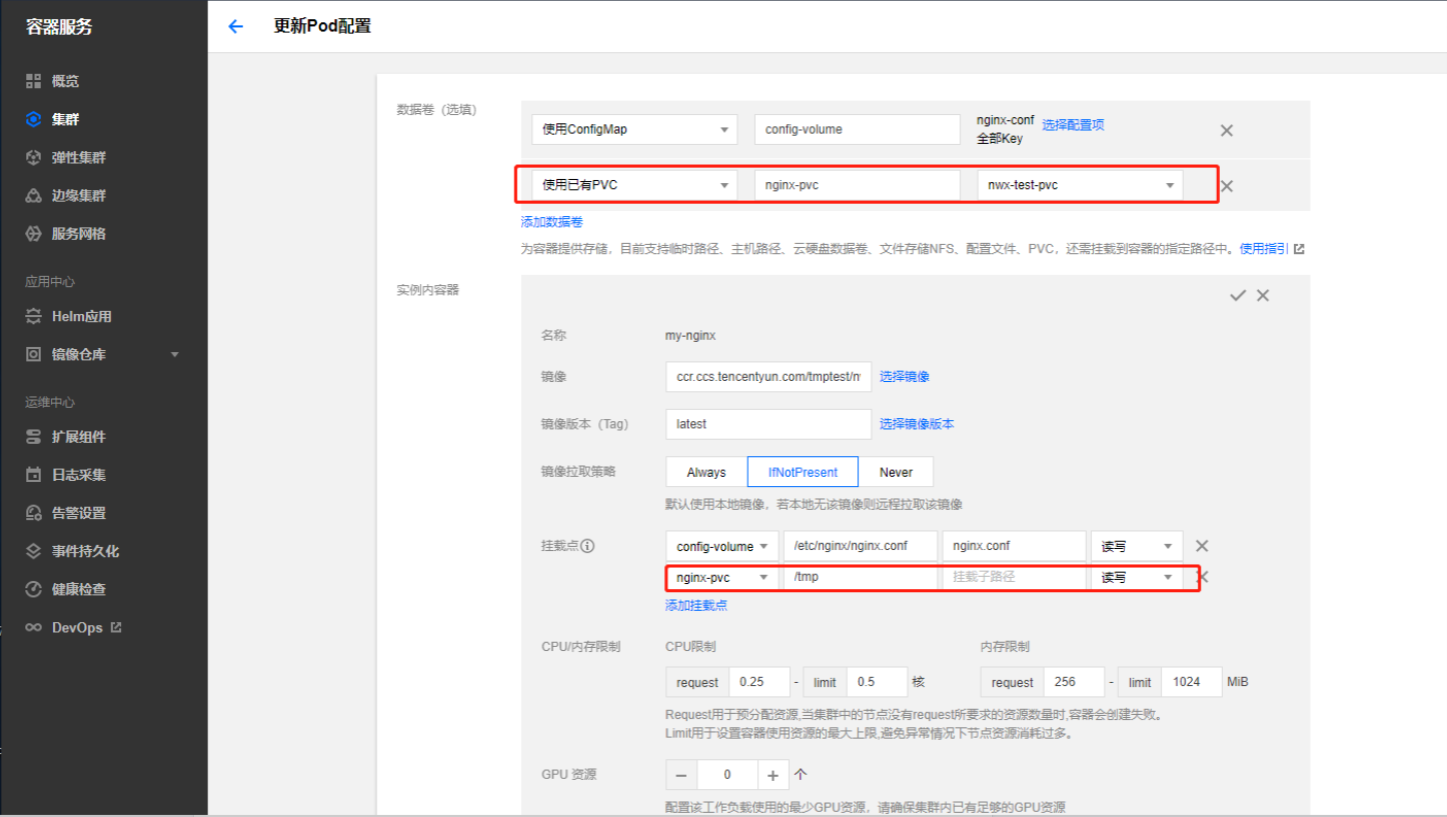
数据卷选择我们之前创建的PVC,然后在挂载点钟选择挂载的PVC和挂载路径,我们这里挂载到/tmp
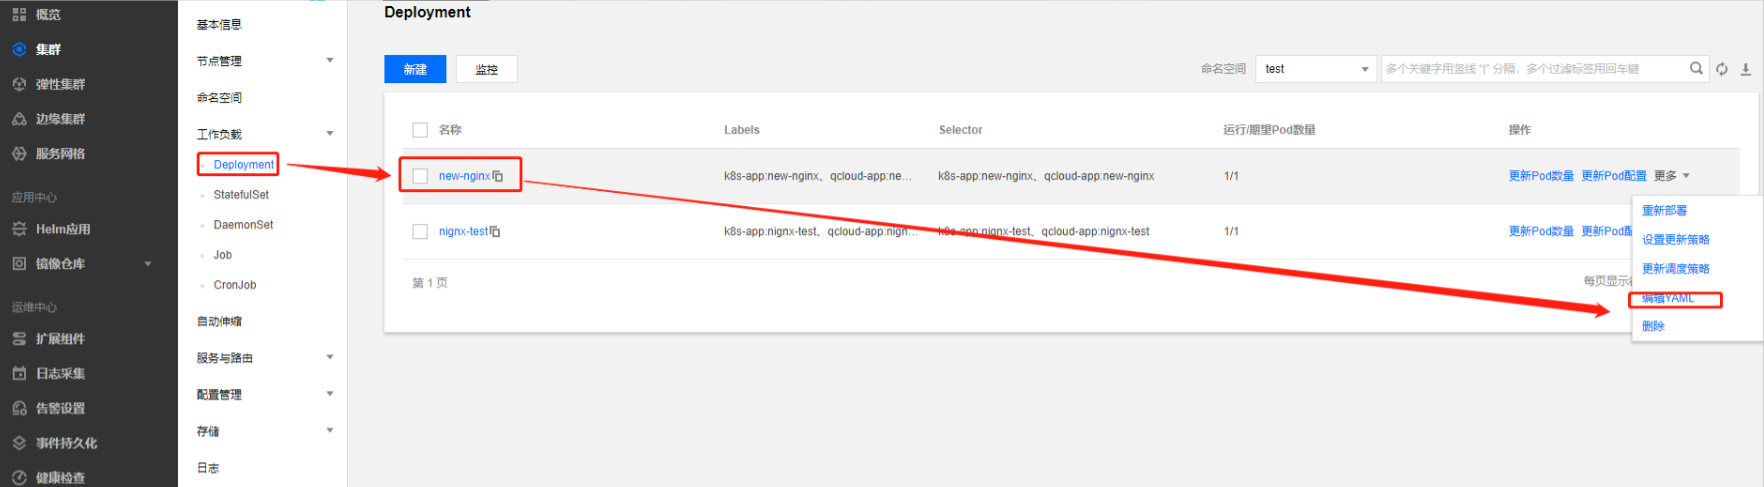
修改yaml挂载PVC
在控制台修改yaml
命令修改yaml
1
2
| [root@VM_0_13_centos ~]
[root@VM_0_13_centos ~]
|
完整的yaml文件
1
2
3
4
5
6
7
8
9
10
11
12
13
14
15
16
17
18
19
20
21
22
23
24
25
26
27
28
29
30
31
32
33
34
35
36
37
38
39
40
41
42
43
44
45
46
47
48
49
50
51
52
53
54
55
56
57
58
59
60
61
62
63
64
65
66
67
68
69
70
71
72
73
74
75
76
77
78
79
80
81
82
83
84
85
86
87
88
89
90
91
92
93
94
95
96
97
| apiVersion: apps/v1beta2
kind: Deployment
metadata:
annotations:
deployment.kubernetes.io/revision: "2"
creationTimestamp: "2020-06-02T09:36:11Z"
generation: 2
labels:
k8s-app: new-nginx
qcloud-app: new-nginx
name: new-nginx
namespace: test
resourceVersion: "8614784222"
selfLink: /apis/apps/v1beta2/namespaces/test/deployments/new-nginx
uid: 7e77455e-a4b4-11ea-9c35-e28957d7d0b3
spec:
progressDeadlineSeconds: 600
replicas: 1
revisionHistoryLimit: 10
selector:
matchLabels:
k8s-app: new-nginx
qcloud-app: new-nginx
strategy:
rollingUpdate:
maxSurge: 1
maxUnavailable: 0
type: RollingUpdate
template:
metadata:
creationTimestamp: null
labels:
k8s-app: new-nginx
qcloud-app: new-nginx
spec:
containers:
- env:
- name: RUNTIME
valueFrom:
configMapKeyRef:
key: RUNTIME
name: nginx-env
optional: false
- name: TZ
valueFrom:
configMapKeyRef:
key: TZ
name: nginx-env
optional: false
image: ccr.ccs.tencentyun.com/tmptest/nwx-nginx
imagePullPolicy: IfNotPresent
name: new-my-nginx
resources:
limits:
cpu: 500m
memory: 1Gi
requests:
cpu: 250m
memory: 256Mi
securityContext:
privileged: false
procMount: Default
terminationMessagePath: /dev/termination-log
terminationMessagePolicy: File
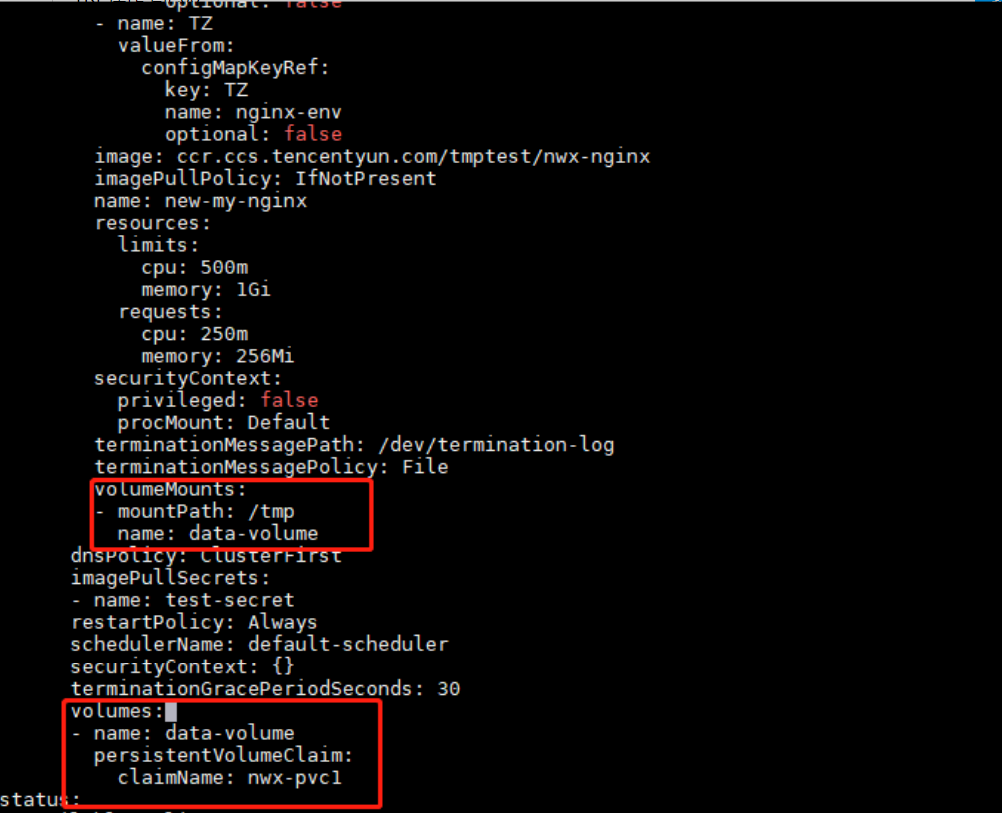
volumeMounts:
- mountPath: /tmp
name: data-volume
dnsPolicy: ClusterFirst
imagePullSecrets:
- name: test-secret
restartPolicy: Always
schedulerName: default-scheduler
securityContext: {}
terminationGracePeriodSeconds: 30
volumes:
- name: data-volume
persistentVolumeClaim:
claimName: nwx-pvc1
status:
availableReplicas: 1
conditions:
- lastTransitionTime: "2020-06-03T02:41:32Z"
lastUpdateTime: "2020-06-03T02:41:32Z"
message: Deployment has minimum availability.
reason: MinimumReplicasAvailable
status: "True"
type: Available
- lastTransitionTime: "2020-06-02T09:36:11Z"
lastUpdateTime: "2020-06-03T02:51:59Z"
message: ReplicaSet "new-nginx-86774775f6" has successfully progressed.
reason: NewReplicaSetAvailable
status: "True"
type: Progressing
observedGeneration: 2
readyReplicas: 1
replicas: 1
updatedReplicas: 1
|
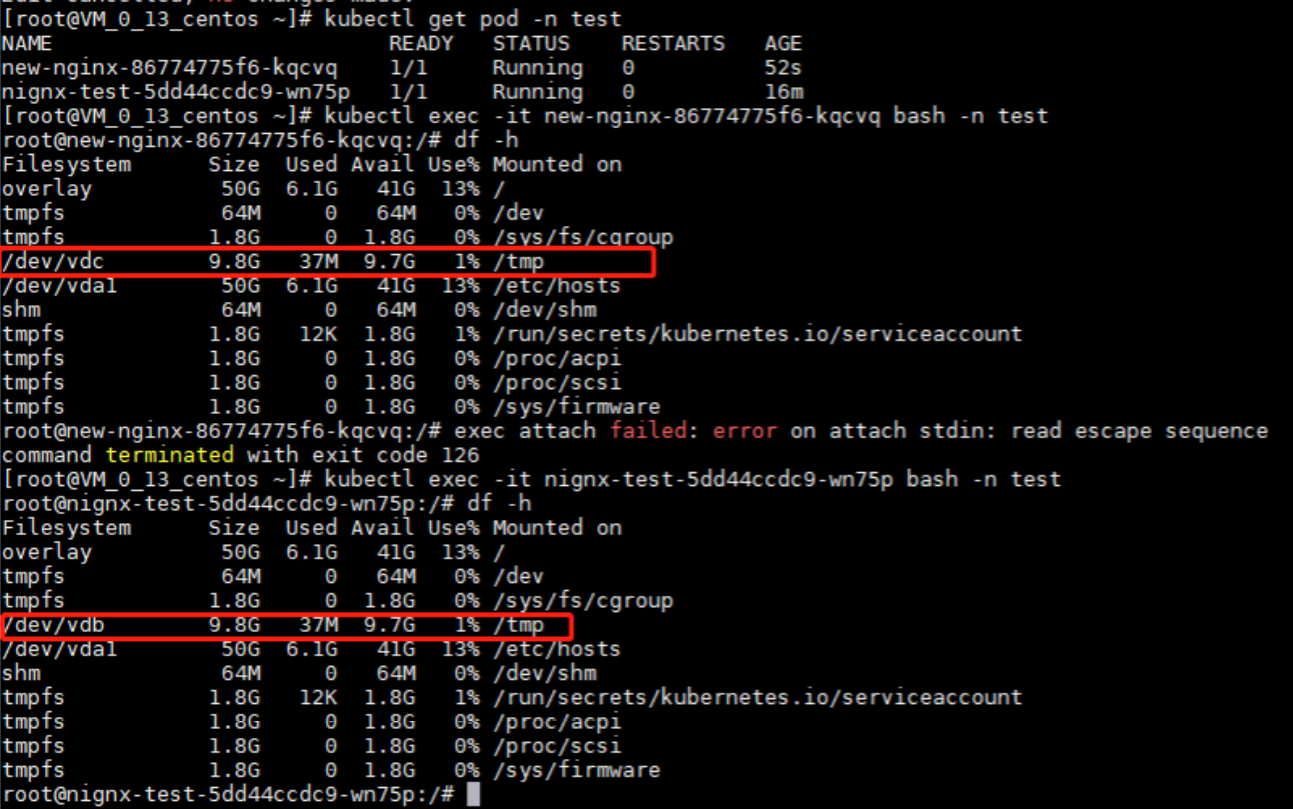
验证PVC是否挂载成功
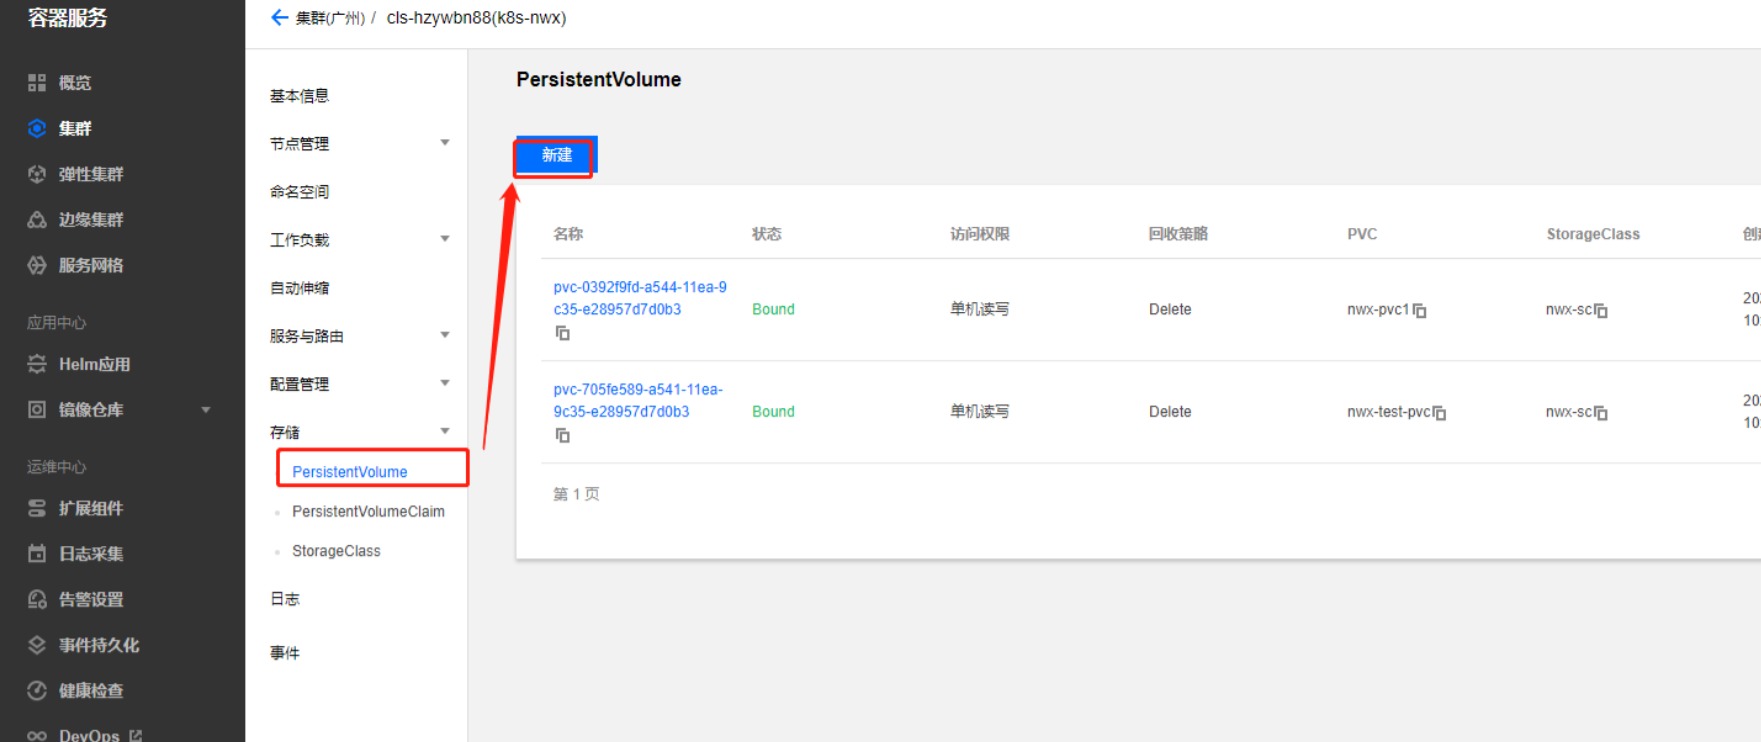
PV的配置使用
动态创建PV
PersistentVolume(PV):集群内的存储资源,例如节点是集群的资源。PV 独立于 Pod 的生命周期,根据不同的 StorageClass 类型创建不同类型的 PV。
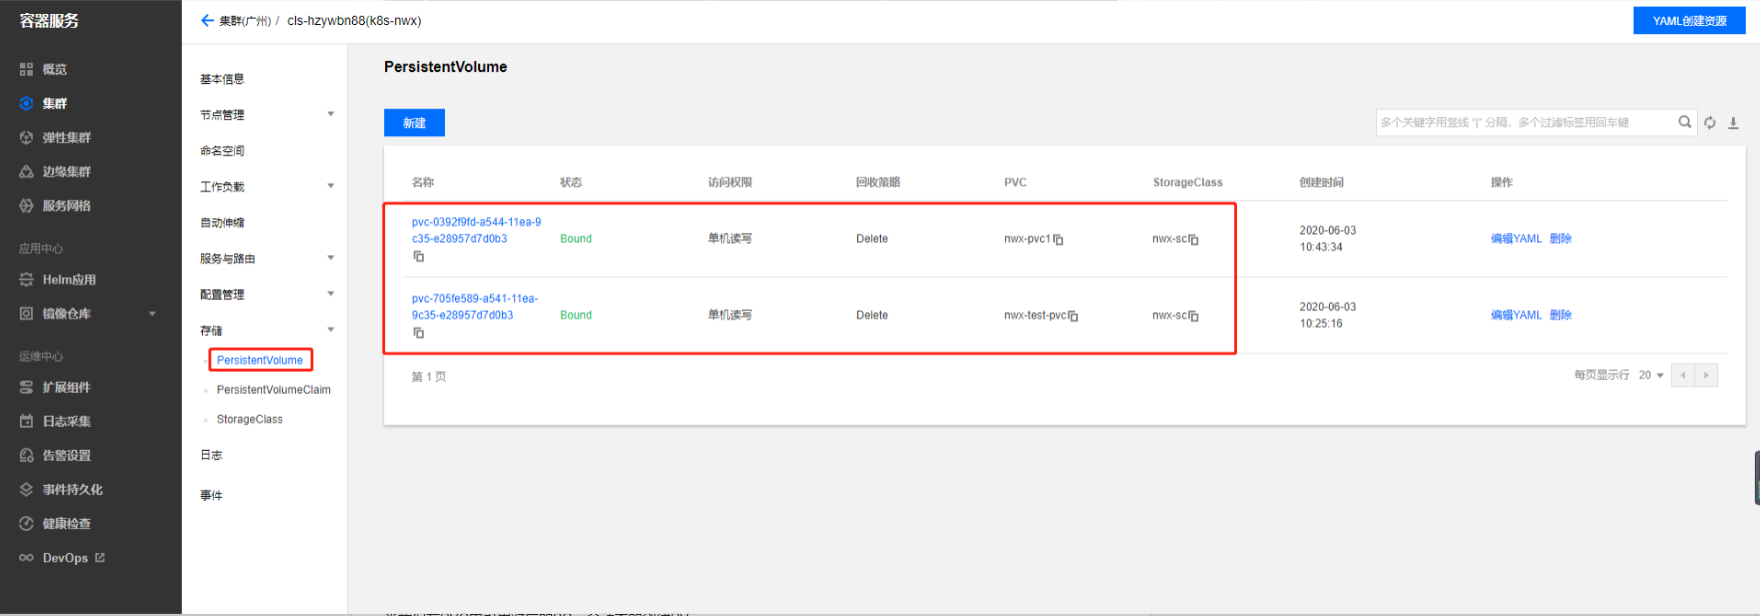
当我们在PVC中引用对应的SC,会动态的创建PV。
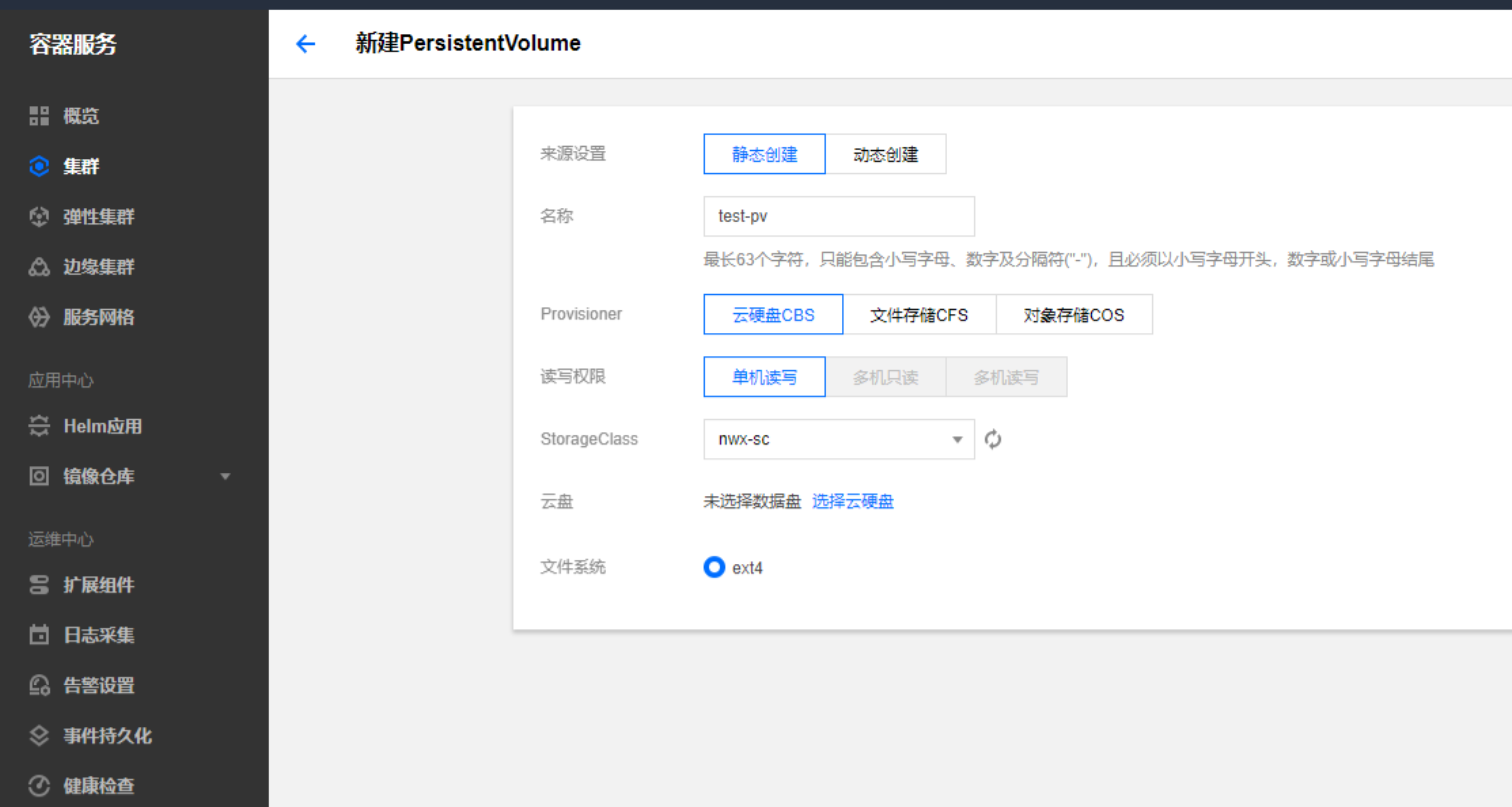
静态创建CBS类型PV
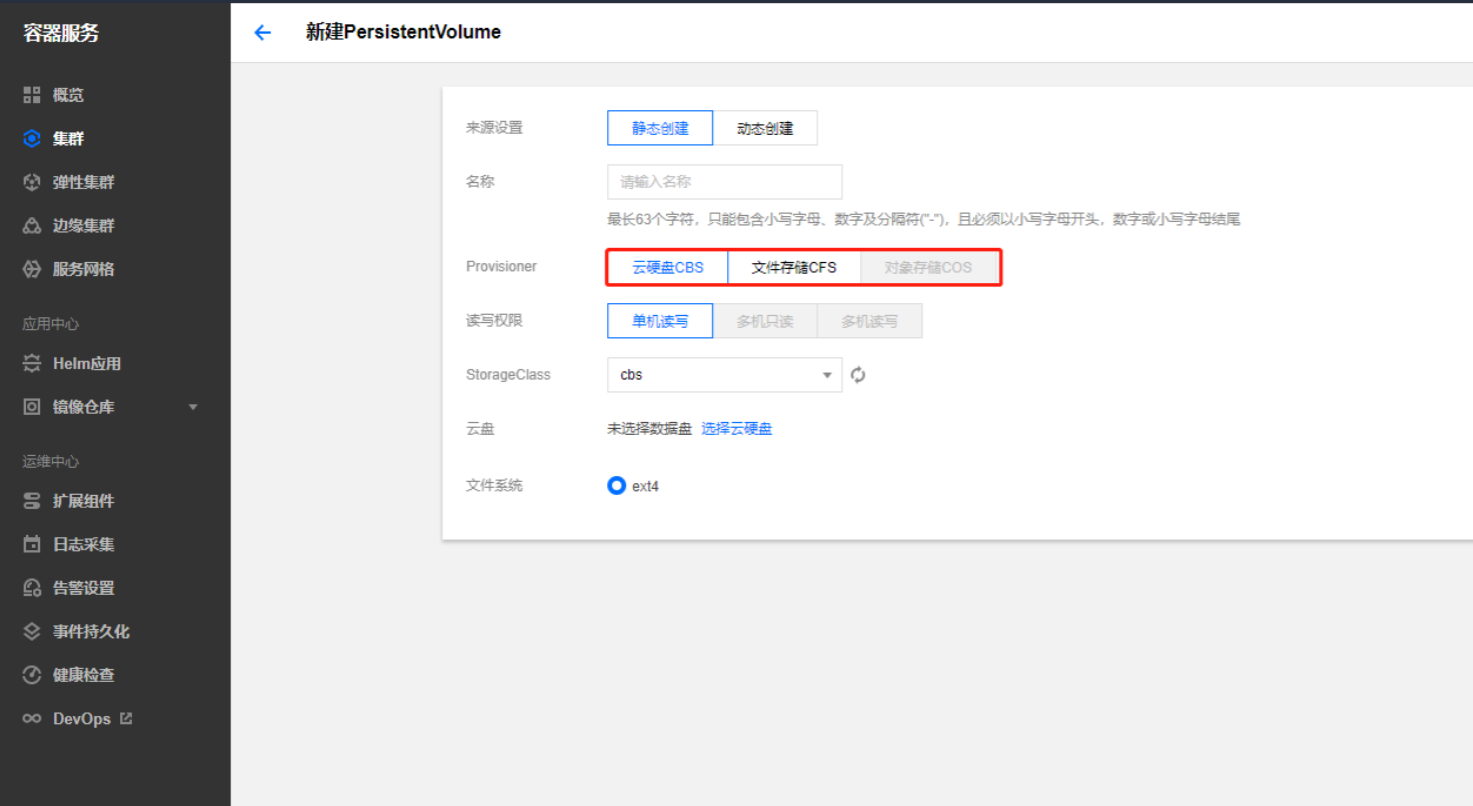
静态PV支持三种类型,CFS和COS需要去扩展组件中安装组件
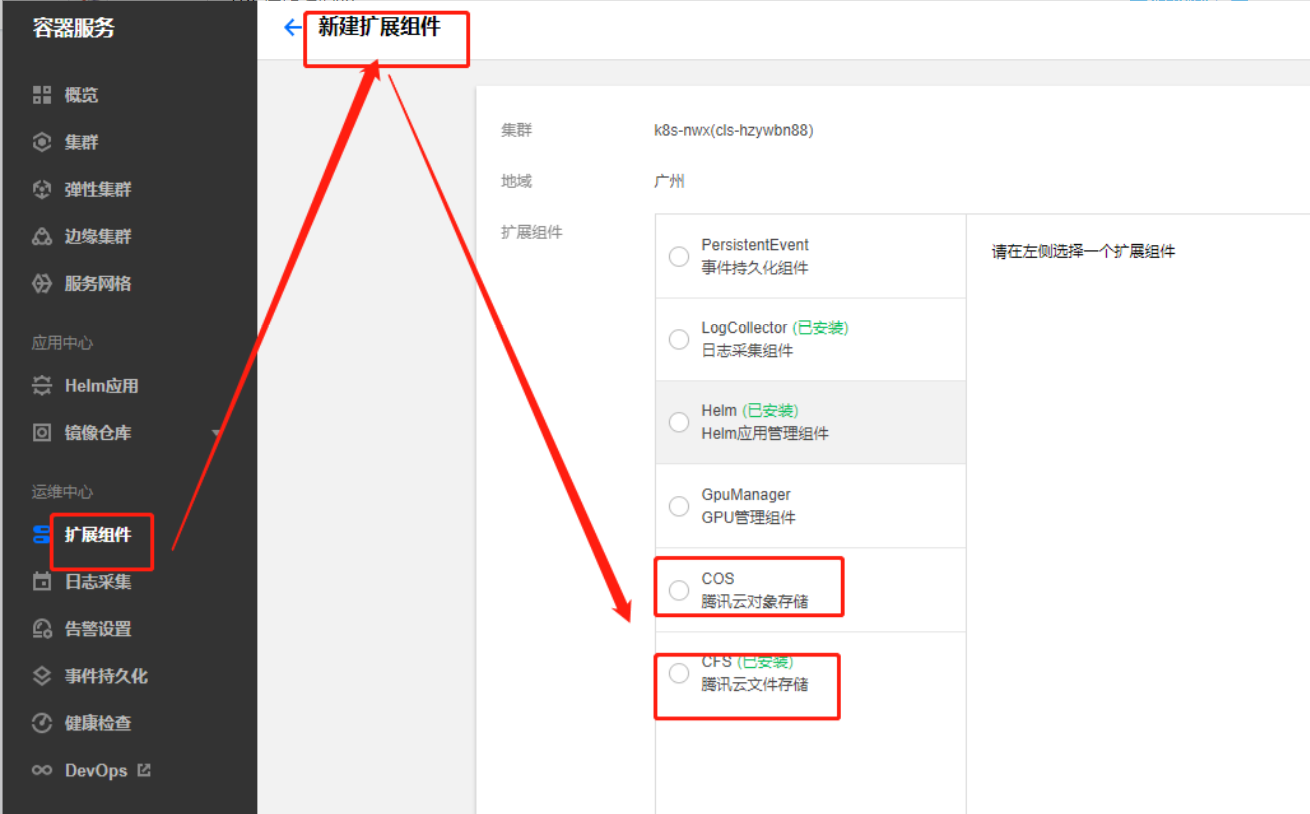
安装COS和CFS组件
静态创建CBS类型pv,选择关联的SC即可
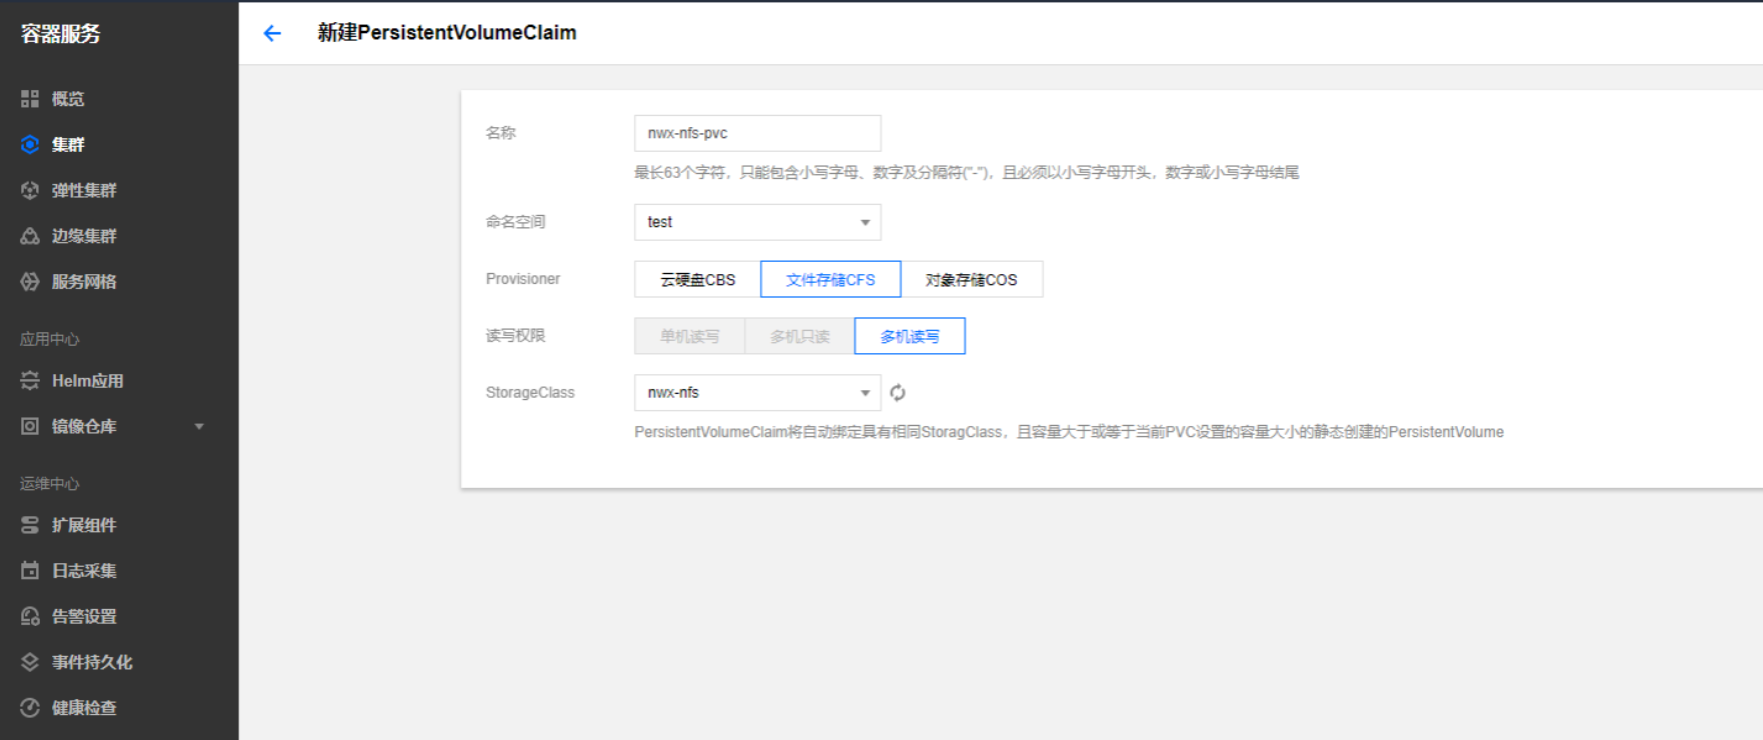
静态创建CFS类型PV并关联到PVC
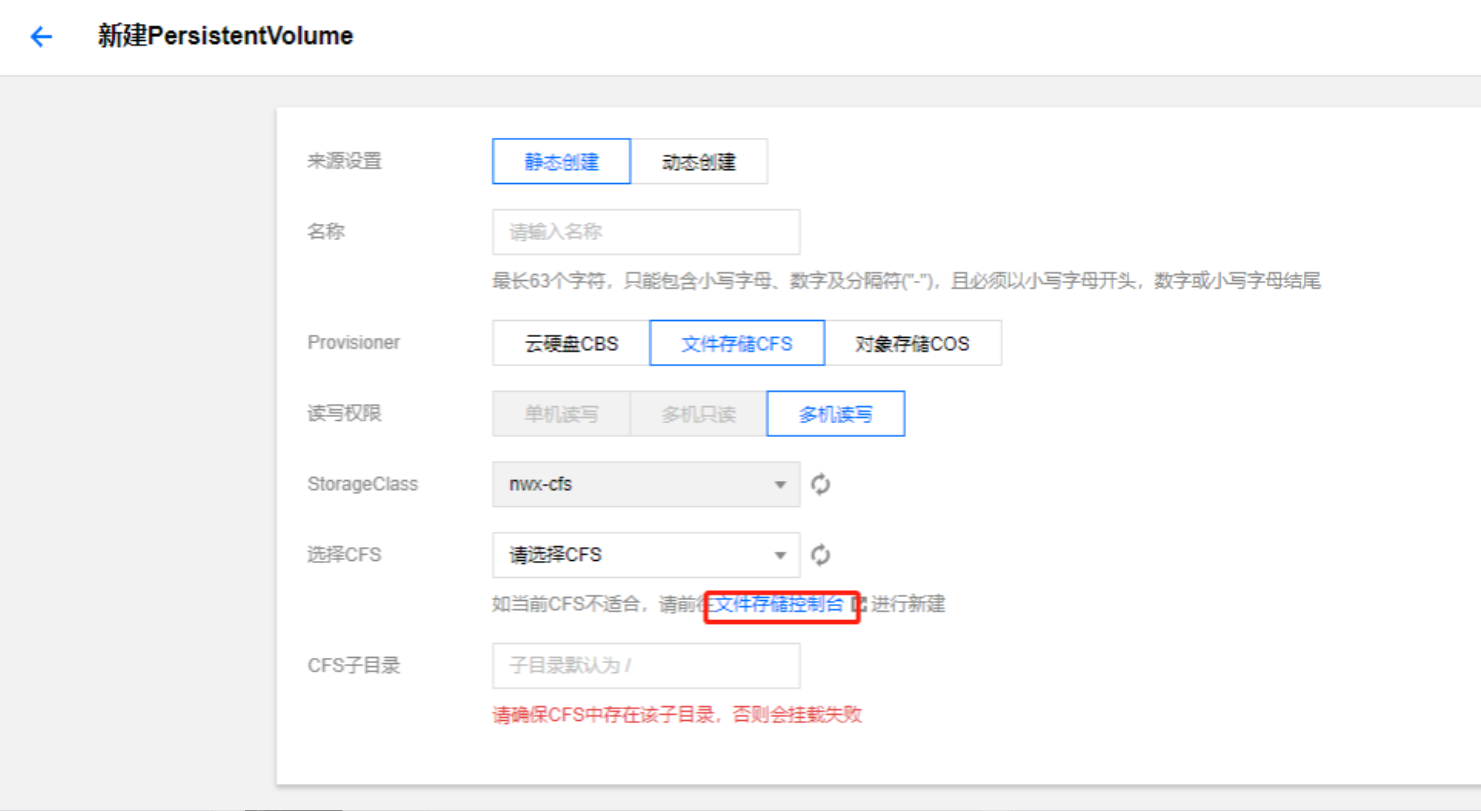
先要创建好CFS类型的SC
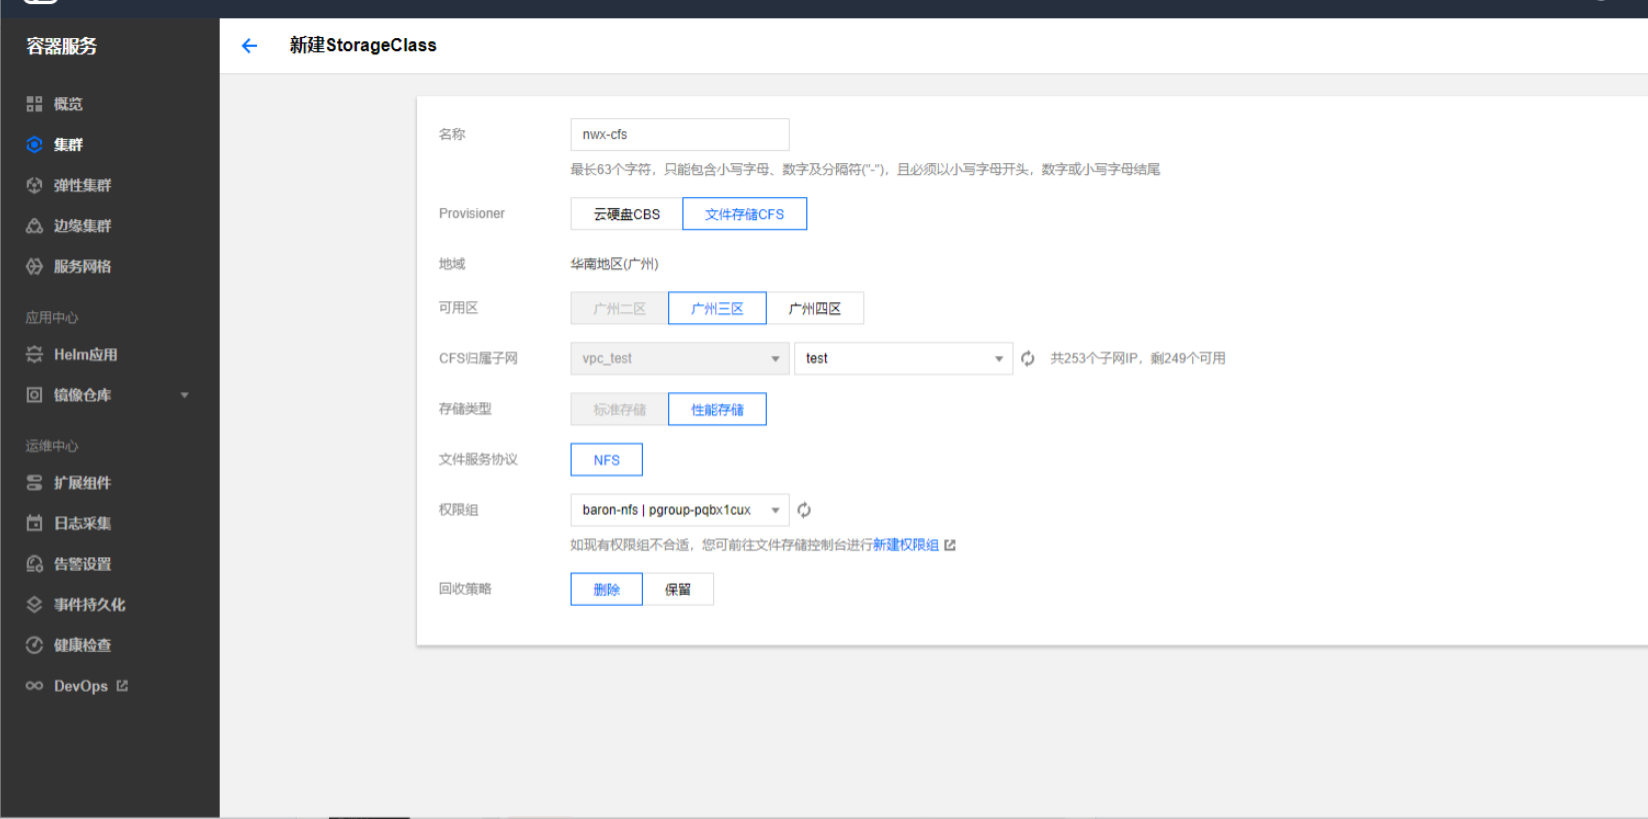
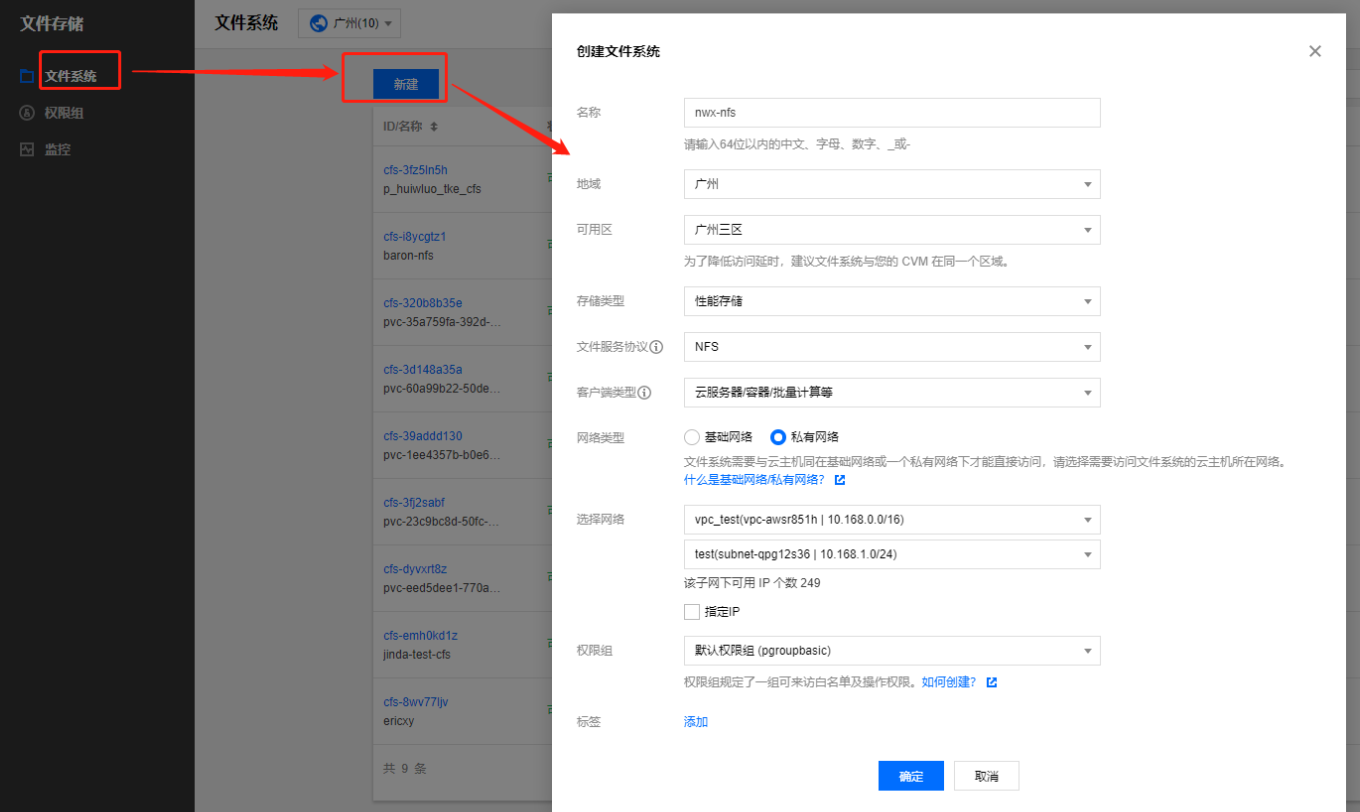
在集群的同一个私有网络下创建NFS

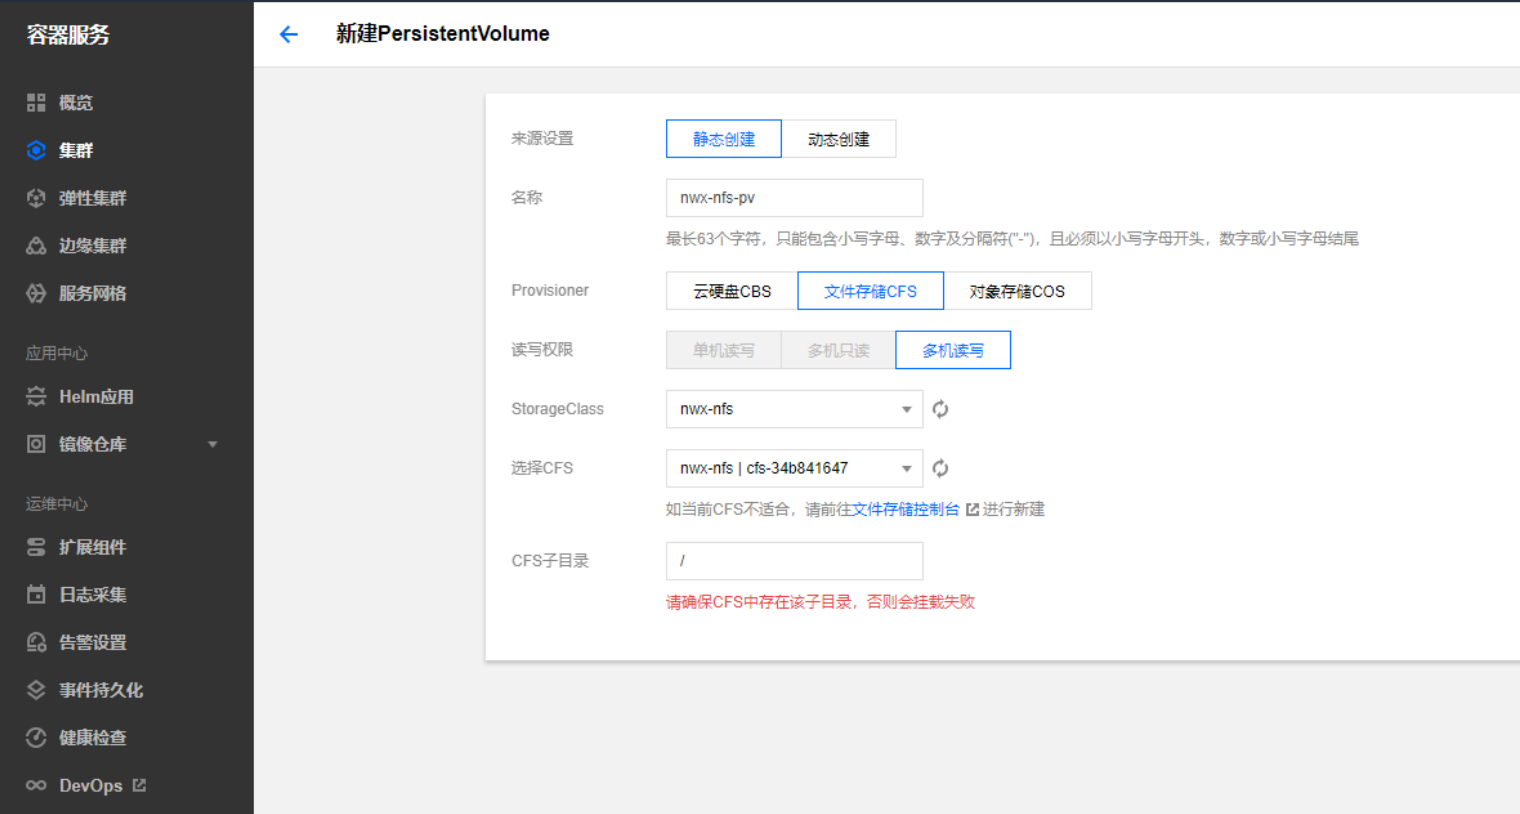
静态创建pv,并关联之前的sc和新建的NFS
创建PVC,关联创建的nfs类型pv,创建成功,即可引用
创建成功,可以在yaml中或者控制台修改deployment配置进行挂载
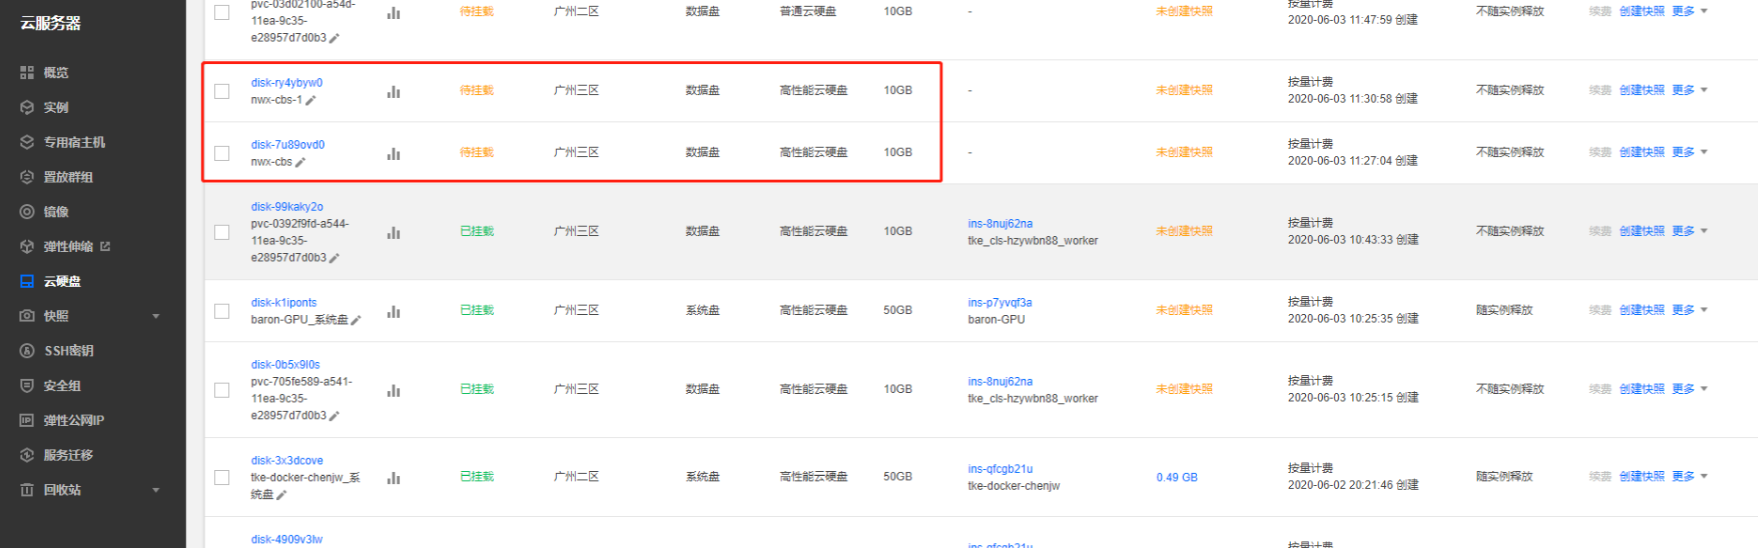
静态创建CBS类型PV并关联到PVC
首先在云服务器中创建你所需要的CBS卷
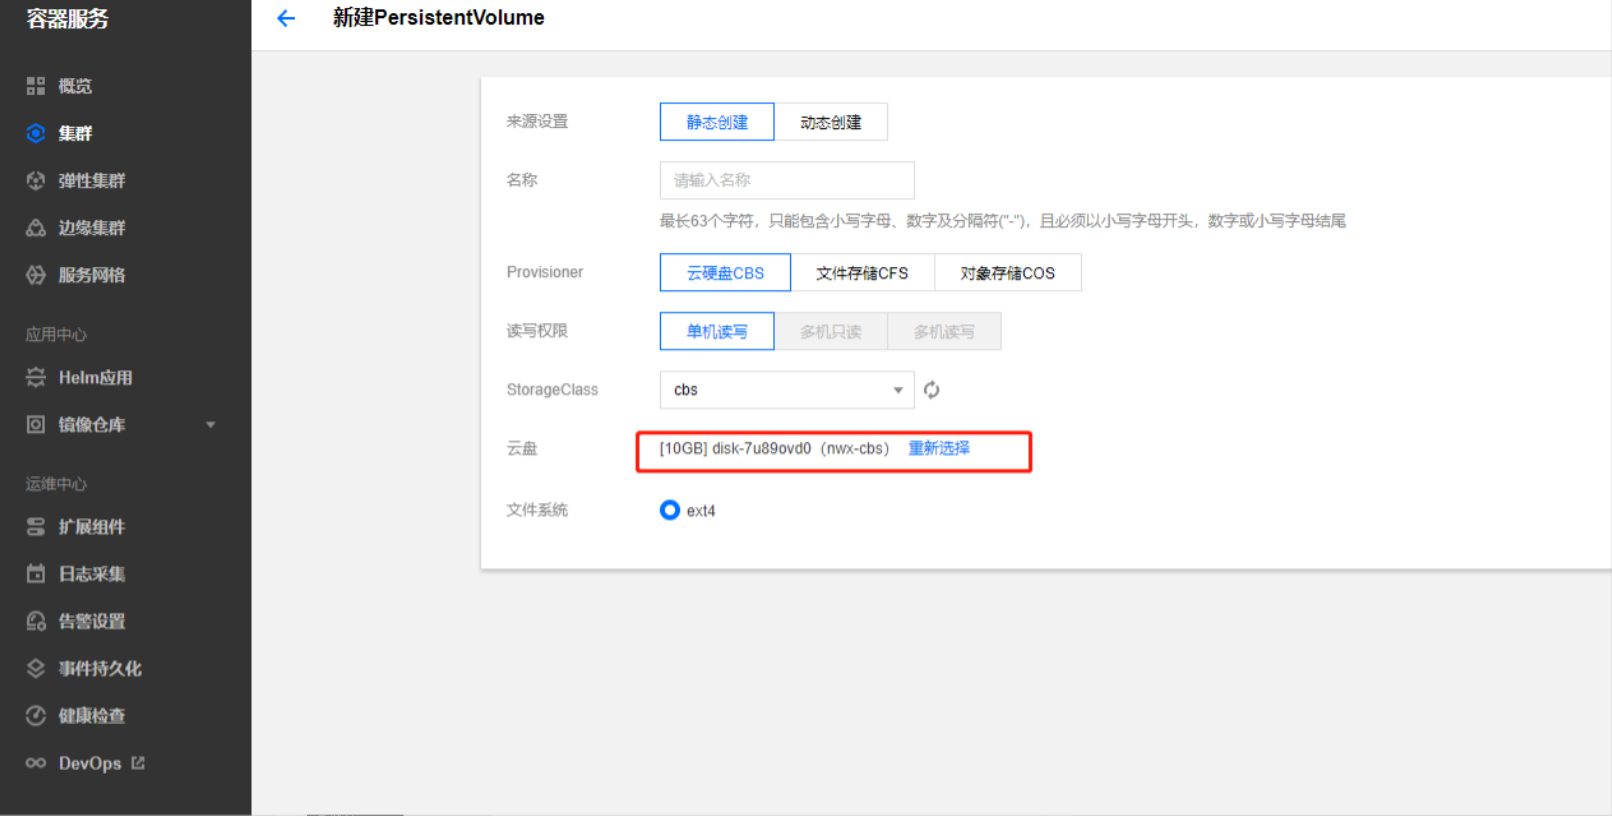
创建pv,选择你创建的云盘
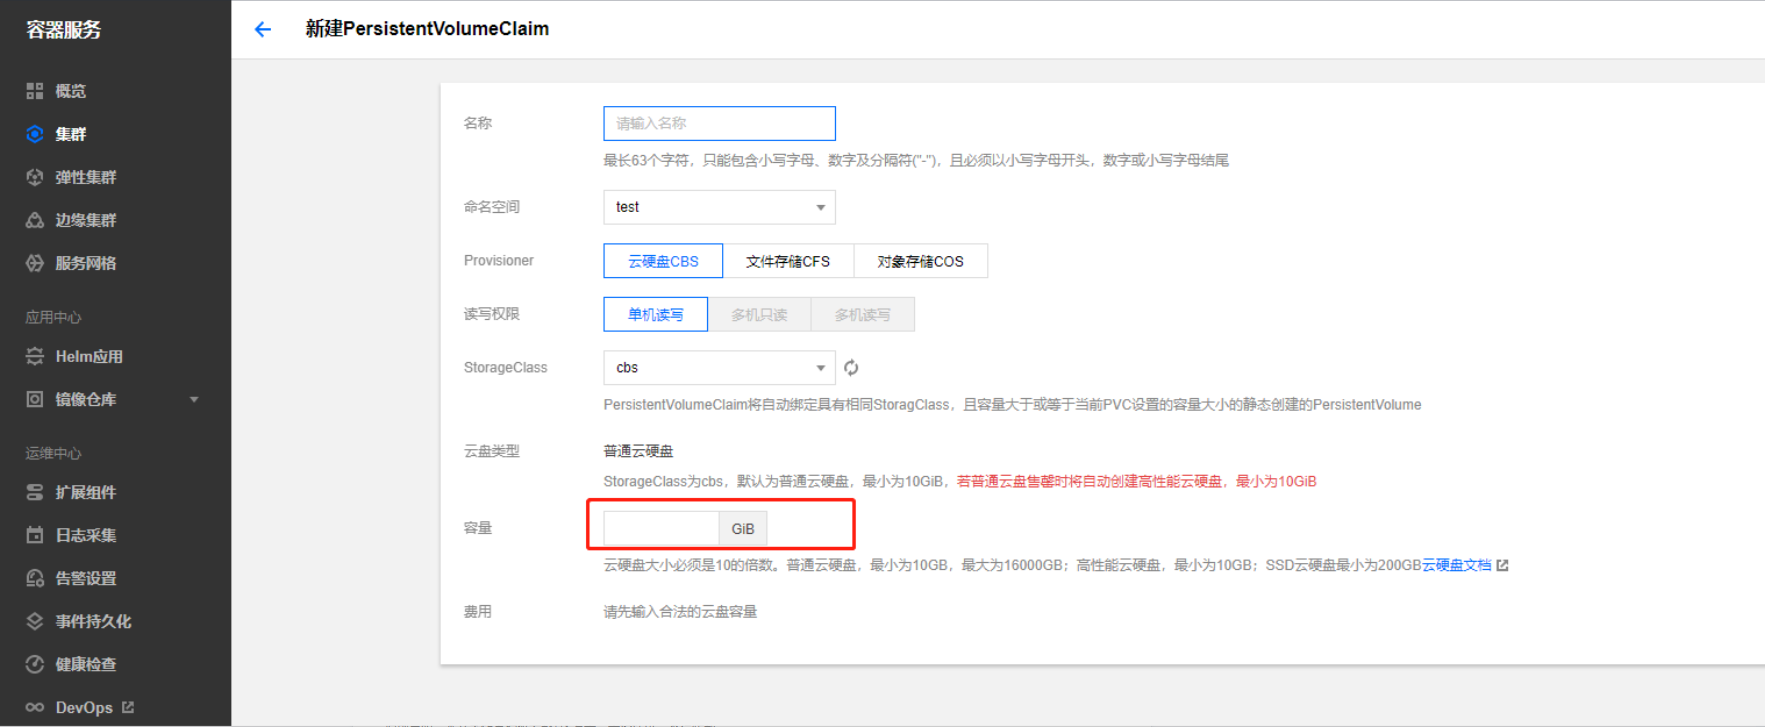
创建PVC,选择你的容量,注意,如果你之前创建了多个PV,PVC关联的规则选择容量大于或等于当前PVC设置的容量大小的静态创建的PersistentVolume
创建成功,可以在yaml中或者控制台修改deployment配置进行挂载